Showing posts with label website. Show all posts

Tuesday, September 11, 2012

Screencast-o-matic - Screencasts and animated gifs with style

I'm a big fan of easy to use, practical tools.  I've found that in Screencast-o-matic.com.  This excellent, easy web-browser based screen recorder makes recording your screen a snap.

You can use headphones or a webcam to record, and you can easily choose the area of monitor to capture.  In one easy step, you can record up to 15 minutes.  In addition to being a wonderful resource for flipped classroom lessons, this tool can easily help teachers make tutorials, videos for substitutes to show whenever they have a planned absence, or demo videos so the teacher can rotate around the classroom instead of being tied to their desk.

It allows pausing and some rerecording as well.  It works on PCs (in Internet Explorer) and on Macs.

When you are finished with your film, you can upload your movie to YouTube, the Screencast-o-matic website, or download it as a movie file.

(Click on photo to see larger image.)


If you choose to download your screencast as a movie file, you can actually download it as an .avi, .mp4, flash .flv, or an animated gif.

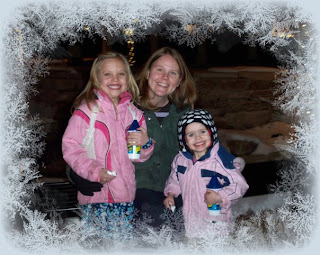
To test out the animated .gif, I made this short .gif file of my niece.


So much fun!


Monday, June 21, 2010

Kristy: VoiceThread

VoiceThread is a tool I learned about during the Blogs, Wikis, and Web 2.0 book study I completed that Kiki Evans facilitated. I loved this book study, and I especially loved VoiceThread.

I finally got around to finishing a VoiceThread introduction to the author of this blog, me. The blog's other contributor - my husband - is interlaced as well.


Here is a VoiceThread I used in my Business Management class. The complexity of the questions progressed throughout the assignment, as it was the first time I utilized this tool in the classroom, and I was trying verify the students understood how VoiceThread worked and I was trying to inform the students about various business concepts. I was afraid to lose someone.


I personally prefer keeping VoiceThreads moderated, because it allows you to check for accuracy before accepting a post, checks for appropriateness, and keeps the students from hearing one another's answer just to cheat.


Wednesday, June 16, 2010

Kristy: acapela.tv

I’d never seen acapela.tv (http://www.acapela.tv) until today, but I already love it. It’s this fun website with a bunch of premade movies that you can put a string of text into and it turns your text into a new movie.

For an example, see here:


Another example of how it could be used in a classroom to introduce a new topic or unit is here: Introducing Vocabulary

It takes seconds to create a great product, and you can even choose your accent!

Sunday, March 14, 2010

Kristy: Wonderful World of Wikis

It took me a while to really jump on the wiki bandwagon, but I'm so glad I finally did. Wikis are so useful in the classroom. It's amazing how many uses there are for them. Not only is it good to have your students learn to responsibly publish content on the web, but it's a great collaboration tool.

Just recently I had my webmastering students create avatars, vokis, and animoto videos and publish them to a wiki. The results were amazing! They also had a discussion on there. I really wish I could share this, but I had to keep it private due to FERPA. (A few students used their photos in their posts but didn't get their parents to sign the proper forms.)

My BCIS students have been creating SuperHeroes or SuperVillains for a PowerPoint project, and they have shared their characters on this wiki:
http://themccoybciswiki.wikispaces.com/. It brought up so many opportunities for positive discussion, and the students are loving the project. There is so much animation in their voices as they compare their Supers and plot out their storylines.

I made this wiki for Kris for our 6th anniversary:
Banner for KM Squared Blog http://kmsquared.wikispaces.com/.

Since you are able to lock the pages, you can often treat your wiki like a blog.

My favorite website for this is WikiSpaces since they have the free educator wikis that allow for removal of advertisements and allow pages to be made private without the fee.

It's so very easy to create and contribute to a wiki. If you haven't tried it you should.

Kristy: GoAnimate

Thanks to a recent bookstudy I participated in, I've discovered a great new website called GoAnimate. There are a lot of fun animations already existing that you can browse, you can make your own animations, and you can have students make animations.

Here is one I created for my webmastering blog to introduce the concept of Web 2.0 to students. I recorded my own voice to use in it, and you can have four different layers of sound at once. I think I'll use this next year as part of my Open House speech or even with students at the beginning of the year to introduce some rules.

GoAnimate.com: Mrs. McCoy Web 2.0 by Kristy@fb

Like it? Create your own at GoAnimate.com.

Here is one created by the creator of my Book Study about another great Web 2.0 tool called WallWisher:

GoAnimate.com: Wallwisher by Dovewhisper


Saturday, March 13, 2010

Kristy: Widgets

I remember the days when the widget was an imaginary item. Those days don’t really exist anymore. There are widgets for websites, blogs, and more. Widgets are real now, and http://www.widgipedia.com and http://www.widgetbox.com/ have really embraced the concept.

Here’s an example of a widget you can grab:


The Widgipedia gallery
requires Adobe Flash
Player 7 or higher.

To view it, click here
to get the latest
Adobe Flash Player.
Get this widget from WidgipediaGet this widget from WidgipediaMore Web & Desktop Widgets @ WidgipediaMore Web & Desktop Widgets @ Widgipedia


Kristy: Pho.to photo options

I’ve recently discovered a great website. http://pho.to/ offers some easy photo editing tools, but it also has some great frames for photos. I’ve been playing with their photo presentation widgets today. It’s seriously a fun website for photographers or wannabe photographers (like me).

One of the fun photo options:

One of my kitties poses with a postcard I received from My Terri

More fun photos:

Have you seen Kris?

Reflections of a Righteous Pair of Teachers

A presentation widget of my Project 365 for the month of January:

January Project 365

A different presentation widget of my Project 365 for the month of February 2010:

February Project 365


Sunday, February 14, 2010

Kristy: Stixy - online creation collaboration

I recently discovered Stixy.com whenever looking up information on Wallwisher.com. I’ve used Wallwisher in the past to create a webpage where students (or people invited to your URL) can add their own posts to a webpage you started. I used this in Webmastering for students to claim the person they wanted to do their Black History Month project on, and we used it with our TLC Club to try to come up with a name for our teacher crafting group.

But I got frustrated by the limited functionality of Wallwisher, as you couldn’t really do more than post text up on the wall and many of the entries would overlap.

Stixy is like Wallwisher, but it has more options. You can create webpages for a variety of reasons. You can add appointments, documents, photos, or sticky notes to the page. You can customize color, font, font size, and font color, and you can move the posts around. The originating publisher can also choose whether or not to allow others to add to the page and what permissions to grant visitors.

Here is a Stixy page I created:


Kristy created Snowy Days Stixy Page Simple and practical.


Tuesday, February 2, 2010

Kristy: Animoto Photo Slideshow

Animoto.com is a fun way to create slideshows to music without any hassle. You can make 30 second ones for free, or you can pay for the unlimited account. Animoto is pretty awesome and allows educators to apply for an Animoto for Educators account. It gives you and your students a free code for 6 months of full access for no cost!

How it works:

Step 1: Upload Photos. It'll tie in to online applications (like Facebook or your online photo hosting sites) or allow you to upload photos from your computer.

Step 2: Choose your 30 second music clip. You can choose from an assortment of songs arranged by genre or upload your own.

Step 3: Publish and save, embed, link, or email your video. Voila!

Here's a quick one I threw together from my first month of my Project 365:


Create your own video slideshow at animoto.com.


Here's one all about why I love the letter T:


Here is one that I made for Kris as an anniversary present for our 6 year anniversary:


Kristy: Cool Text, Buttons, and Logos

A great tool for making your own neat text for websites, blogs, or anywhere you can place a photo, cooltext.com offers easy to use tools to make some really flashy or classy items.

Here is a quick logo/image I made:


Kristy Logo from CoolText.com


Here is another:


I approve this message (on woodgrain background).
Each of these took less than 2 minutes to make.

You can also make buttons for websites or blogs:

Visit CoolText.com to make your own buttons and suchEnjoy!

Tuesday, January 26, 2010

Kristy: Tagul - the interactive word cloud maker

Earlier I spoke about Wordle, which generate word clouds from text to generate a customizable word cloud. The newest word cloud generator is Tagul, which allows you to create word clouds with words that function as hyperlinks.

Below you’ll find my first Tagul cloud. All of the words were pulled from somewhere inside of this blog.


Sunday, January 24, 2010

Kristy: Digital Posters

Digital posters are fun, and they can easily be made using www.glogster.com. Even better is http://edu.glogster.com/, which allows you to register as a teacher and have up to 200 student accounts under your name.

Here’s an example of a poster I’ve made to explain an assignment to students: http://kerplode.edu.glogster.com/edit/posterize-your-favorite-class/

Here’s a screen-shot if you didn’t want to click on the link:

Glogster created poster
Here is a wonderful example of a student Glogster of the Skeletal System: http://cbrannon.wiki.hoover.k12.al.us/Skeletal+System+Glog2

Here is a wonderful tutorial on how to use Glogster as created by Traci Blazosky: http://docs.google.com/View?docid=dgqwv5cr_127g7nqc8fm

There are a lot of options for this one. Happy postering.

Thursday, January 21, 2010

Kristy: Motivators

A really fun website is http://bighugelabs.com/motivator.php. This website allows you to make a motivational-style poster in about three minutes. Upload a photo, supply a headline and short text, and you get something like this:

Kris painted this Santa a few years back 
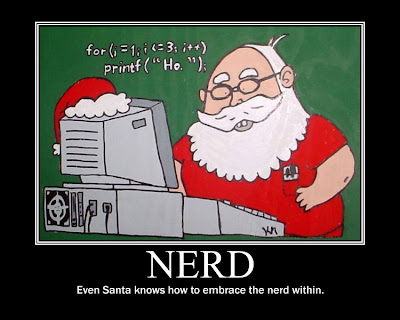
Super easy to do. Put one in a PowerPoint, make your own classroom posters, or students could even make one. There are a lot of possibilities here.

Sunday, January 17, 2010

Kristy: Word Cloud Maker - Wordle.net

http://www.wordle.net/ is another one of my favorite things. This is really fun to let the students use in the classroom. From writing about things you are grateful for around Thanksgiving to using it as a tool to describe yourself, a character in a novel, or almost anything you can think of, the end result is always cool.


Wordle: States of the United States
A Wordle.net word cloud I made to describe the classes I teach

Wordle: A Journal a student wrote for a class

Wordle is a toy for generating “word clouds” from text that you provide. If you type a word in more often, it’ll make that particular word larger than the others. You can change your clouds with different fonts, layouts, and colors. You are allowed to print the clouds out or save them to the Wordle gallery to share.


Kristy: Photo Editing without Photoshop

I recently discovered the website http://www.picnik.com/.

I absolutely love this site. You can use many of the features for free, and you can preview the features that only premium members can use. I went ahead and paid the $25 for the year’s membership. It was money well spent.

In addition to simple editing like fixing exposure, cropping, resizing, or removing red eye, Picnik allows users to easily remove blemishes, shine, whiten teeth, add fun text, add frames, or do special effects and collages.

It will allow you to save the edited image to your computer, Facebook, Flickr, MySpace, or other websites. You can even make slideshows.

Listed below are some of my Picniked images.

This is a photo of my niece, Lilyana:

Lilyana Mae Dassinger
I did no retouching to the image itself. I just added a frame and text.

This is a photo of me with my nieces Aubree and Kayna:

Aunt Kristy with nieces Kayna (left) and Aubree (right)
This photo had exposure issues, and we added a frame. It was cold in Colorado.

This is a before and after photo:

Kristy McCoy:  Before & After editing image with Picnik I used Picnik to airbrush, add highlights, make me thinner, whiten my teeth, change my eye color, and remove shine. Then I used the before and after frame available in the application.

Cool stuff. Of course, I just gave away my secret...


Saturday, January 16, 2010

Kristy: Fonts, fonts, and more fonts

To those that know me, it’s no secret that I like using alternate fonts to the standards. Due to that, I love the following websites: http://www.dafont.com/ and http://www.kevinandamanda.com/fonts/ which offer a plethora of free fonts for download and no account needed. (There are many free font websites out there. These are just a few of my favorites.)

Thanks to http://www.kevinandamanda.com/whatsnew/tutorials/how-to-use-a-cute-font-for-your-blogger-post-titles.html I was able to use a favorite font of mine as my new Blogger post title font.

For those of you that don’t know offhand how to install a new font, the process is actually pretty easy (but also easy to forget). There are many web resources out there if you search for “How to install a font”, but here is a pretty good tutorial with some screen shots of the process: http://www.kevinandamanda.com/scrapbook/fonts/download-and-install/.

There are also resources out there that allow you to create your own font. I was able to create one for free back in early December, but that company has changed domains and now charges $10 to make your own handwriting font. Even if you pay though, it’s still fun to have your own font. It costs $9 to do it at http://www.fontifier.com/.

The font I made using fontcapture.com


There is also http://fontstruct.fontshop.com/. FontStruct lets you quickly and easily create fonts constructed out of geometrical shapes, which are arranged in a grid pattern, like tiles or bricks. Even if you don’t want to make one, you can still download these fonts.

Happy Fonting.

(Yes, I realize that font isn’t intended to be a verb.)